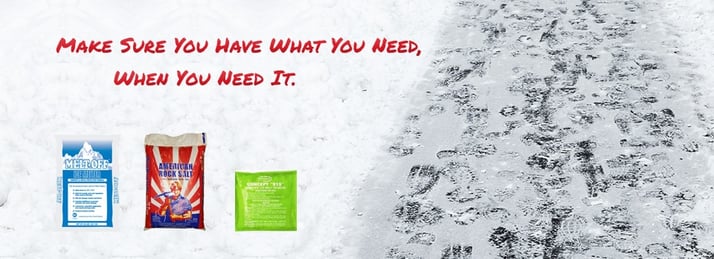
Make sure you have the ice melt supplies you need, and know when and how to properly apply ice melt to keep your guests, grounds, and facility safe this winter. Follow these simple 6 tips for safely using and applying ice melt.
Tip #1: Don’t wait until the last minute.
The best time to think about ice melt is before you need it to ensure the safety of your facility, staff, and guests. Waiting until the last minute to put in orders may mean not getting what you need, when you need it. Make arrangements early to ensure you have what’s necessary to meet your needs.
Not only should you buy ahead of time, you need to treat surfaces ahead of time as well. The benefit of pretreating is that you won’t need as much product in the long run because it prevents ice from bonding to the surface. Ice melt is much more effective if the surfaces are pretreated before icing occurs.
Manufacturers also recommend applying ice melt before, during, and at the end of winter storms to ensure maximum and long-term deicing results. Staying on top of the situation means potential cost savings in terms of not only product, but also labor.
Tip #2: Avoid wasting money on cheap ice melt. Make sure you are using the correct ice melt and proper amount for your environment and specific application.
Using cheap ice melt or the wrong product may result in unmelted ice, as well as wasting overused product. Remember that the lowest price may help you short term, but if you have to use more for it to work, then it's not really a lower price in the long run. If you notice that ice is not melting on your walkways even though you're using an ample amount of product, you may have the wrong product. In general, 2-4 ounces of product should be used per square yard.
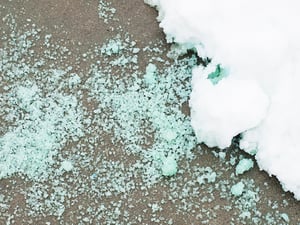 Besides overuse, the biggest mistake most ice melt customers make is buying a product that is not ideal for their specific ice melting needs.
There are a variety of ice melters including solarized salt, rock salt, calcium chloride, magnesium chloride, potassium chloride, urea, and triple melts and blends. When choosing a product, it’s important to know that each ice melt variety has its own unique melting temperature and affects concrete and vegetation differently. That’s why you need to choose a product geared to your specific weather conditions, temperatures, and facility materials.
Think of your ice melt as insurance. Most days, basic coverage will be fine, but when the weather turns, customers are going to want the best coverage they can get to ensure the long term safety of their guests, staff, and facility. Research ice melt formulas to fully understand their melting temperature, and potential damage to concrete and vegetation. Millions of dollars of damage to buildings, landscaping, and flooring are caused each winter due to poor, cheap ice melt formulas. Be sure to educate yourself on the different elements that make ice melters effective and safe, and know if an ice melt is hygroscopic (read as "bad!") or not.
View side-by-side comparisons of different ice melt formulas and learn why hygroscopic (Magnesium Chloride and Calcium Chloride) ice melts are harmful to concrete and vegetation.
Tip #3: Make sure you are using your ice melt/rock salt products safely and efficiently.
Protect eyes and skin by wearing appropriate protective eyewear and gloves, particularly when using Magnesium Chloride and Calcium Chloride ice melters that are hygroscopic and pull moisture from skin.
Use the recommended amount. Overuse can be harmful to building materials and vegetation, as well as increases costs. The best precaution is to use spreaders with guards to prevent ice melters from being applied to areas that can be damaged. For narrow pathways and walks, drop spreaders are most effective.
Tip #4: Further reduce slips and falls and prevent tracking with a three-mat system.
Cleaning professionals know that floor care is one of the most time consuming and expensive tasks within a facility. During the winter, floor care becomes even more expensive and labor intensive when trying to clean and protect floors from damaging winter-specific soils, such as ice melt, rock salt, sand, and heavier foot traffic that can damage a floor's finish creating dangerous slip and fall hazards.
A comprehensive matting system prevents ice melt, moisture, and other winter soils from entering and being tracked throughout a building. According to the ISSA, approximately 85% of all dirt is tracked in by foot and it costs almost $600 to remove one pound of soil. Dirt stopped by entrance matting is dirt that does not spread throughout a building, which means less labor and costs associated with dusting, mopping, vacuuming, and grout cleaning. Overall, removing soil from a mat is less expensive than removing it from an entire building as the soil is concentrated in a localized area.
When creating a winter matting system for your facility, you can deliver best results by implementing the a three-mat system at all entryways to maximize soil capture, prevent tracking, and reduce overall floor cleaning costs.- Mat 1 - outdoor scraper mats to capture larger dirt and ice melt particles and moisture before they can enter your facility.
- Mat 2 - wiper/scraper mats directly inside the entryway to stop any soil missed by the outdoor scraper mats.
- Mat 3 - interior wiper mats beyond that to remove any remaining dirt and moisture.
Watch how a three-mat system effectively stops dirt and moisture from entering your building, and reduces overall floor cleaning costs and labor.
Tip #5: Properly clean and remove ice melt to avoid ruining mats and floor.
Make sure to properly vacuum and remove ice melt, rock salt, sand, and other winter-specific soils to avoid ruining mats and surrounding flooring. Consider using a canister vacuum or backpack vacuum as they offer direct suction. Upright vacuums are also good, but the brush in upright vacuums may stir up dust polluting indoor air quality (IAQ) or pull at lighter weight carpets.
Clean mats with little or no soap and use an ice melt residue remover to remove unsightly white powdery marks. Mats in high traffic areas may become saturated with moisture and soil, which occupants will then track into the facility. Replace mats throughout the day as needed under very adverse weather conditions or use high velocity air movers. Avoid installing the mats until thoroughly dry.
Tip #6: Properly store ice melt/rock salt away from moisture, air, and sunlight.
Open bags of ice melt should be stored in airtight containers and kept away from moisture, air, and sunlight. Again, Magnesium Chloride and Calcium Chloride based ice melters are hygroscopic and will draw moisture out of the air. Be sure to completely seal bags/containers as exposed ice melt will absorb moisture causing the product to degrade, clump, and harden.
If you have unopened product leftover at the end of the season, you can leave it as is. However, we suggest covering bagged ice melt and airtight containers with a dark wrap to keep bags from becoming brittle from ultra violet exposure and to provide an extra level of protection from moisture.
Product Recommendations
|
RDI#12649
|
RDI#20235
|
|
Make sure you have what you need before you need it this winter to
keep your guests, grounds, and facility safe.


